# Setup
**The Pendant is not a stand alone device**, it is an arm of Spikemark. This means it must be connected to the same network as Spikemark - and Spikemark must be running. Setting up the Pendant is straightforward. With only few cable connections and a few IP Addresses you’ll be up and running in no time.
## MAKING THE CONNECTIONS
1. Connect the Pendant Cable between the Pendant and the Pendant Adapter Box
2. Connect your Computer and Pendant Adapter Box to your Network Switch
3. Connect your Showstopper Accessory Cable to your Showstopper Base
{% hint style="warning" %}
**BEFORE POWERING ON THE PENDANT**
**All network cables must be connected prior to powering on the Pendant.** If it does not sense network capability on startup, the Pendant will fail to initialze the configuration screen and **you will be left with only the cursor on a black background.**
If your Pendant doesn't load the configuration screen:
1. Power off the Pendant
2. Plug in the network cable to the same system as Spikemark
3. Power on the Pedant
{% endhint %}
## Network Settings
Because the Pendant is a networked device it needs to have a unique static IP address. This address must be set on both the Pendant and in Spikemark to allow communication to the Pendant. In addition, the Pendant must be configured with the Spikemark PC's IP Address.
### PENDANT SETTINGS
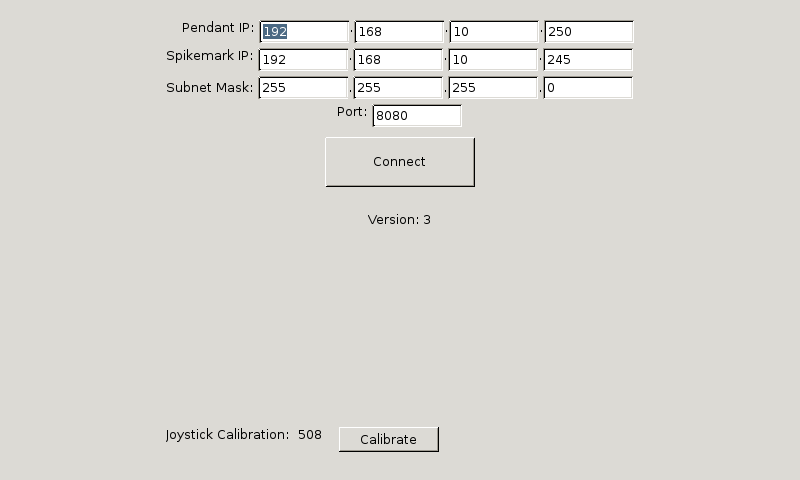
Once the connections are made and there is power to the Showstopper Base, the Pendant will power on. Once the boot up process is complete, the Pendant will be at the configuration screen.

The default IP Address values will be completed for both the computer running Spikemark as well as the Pendant:
* Spikemark IP: 192.168.10.245
* This is the default IP Address of the computer running Spikemark
* Pendant IP: 192.168.10.250
* This is the default IP Address of the Pendant
* Subnet Mask: 255.255.255.0
* Port: 8080
The default values are merely suggestions based on how we configure the Spikemark network. Have no fear, you can easily change these values to fit into your network settings. Select a value to change, either with your finger (it's a touch screen) or use the touchpad on the included Bluetooth keyboard. You can scroll through the values with the jog wheel or use the keyboard to delete and enter the value directly.
Any changes to the IP Addresses, Subnet or Port will be saved to the Pendant once the Connect button is pressed.
#### Set Pendant IP Address
Because the Pendant is a networked device it needs to have a unique static IP address. This address must be set on both the Pendant and in Spikemark to allow communication to the Pendant.
Once the connections are made and there is power to the Showstopper Base, the Pendant will power on. Once the boot up process is complete, the Pendant will be at the configuration screen.
The default IP Address values will be completed for both the computer running Spikemark as well as the Pendant:
* Spikemark IP: 192.168.10.245
* This is the default IP Address of the computer running Spikemark
* Pendant IP: 192.168.10.250
* This is the default IP Address of the Pendant
* Subnet Mask: 255.255.255.0
* Port: 8080
The default values are merely suggestions based on how we [configure the Spikemark network](https://docs.creativeconners.com/docs/spikemark/ip-address-and-network-connection). Have no fear, you can easily change these values to fit into your network settings.
Select a value to change, either with your finger (it's a touch screen) or use the touchpad on the included Bluetooth keyboard.
You can scroll through the values with the jog wheel or use the keyboard to delete and enter the value directly.
Any changes to the IP Addresses, Subnet or Port will be saved to the Pendant once the Connect button is pressed.
{% content-ref url="../../spikemark/ip-address-and-network-connection/setting-pendant-ip-address" %}
[setting-pendant-ip-address](https://docs.creativeconners.com/docs/spikemark/ip-address-and-network-connection/setting-pendant-ip-address)
{% endcontent-ref %}
### SPIKEMARK SETTINGS
If you have set up a Stagehand in the past, setting the Pendant IP Address will feel familiar enough.
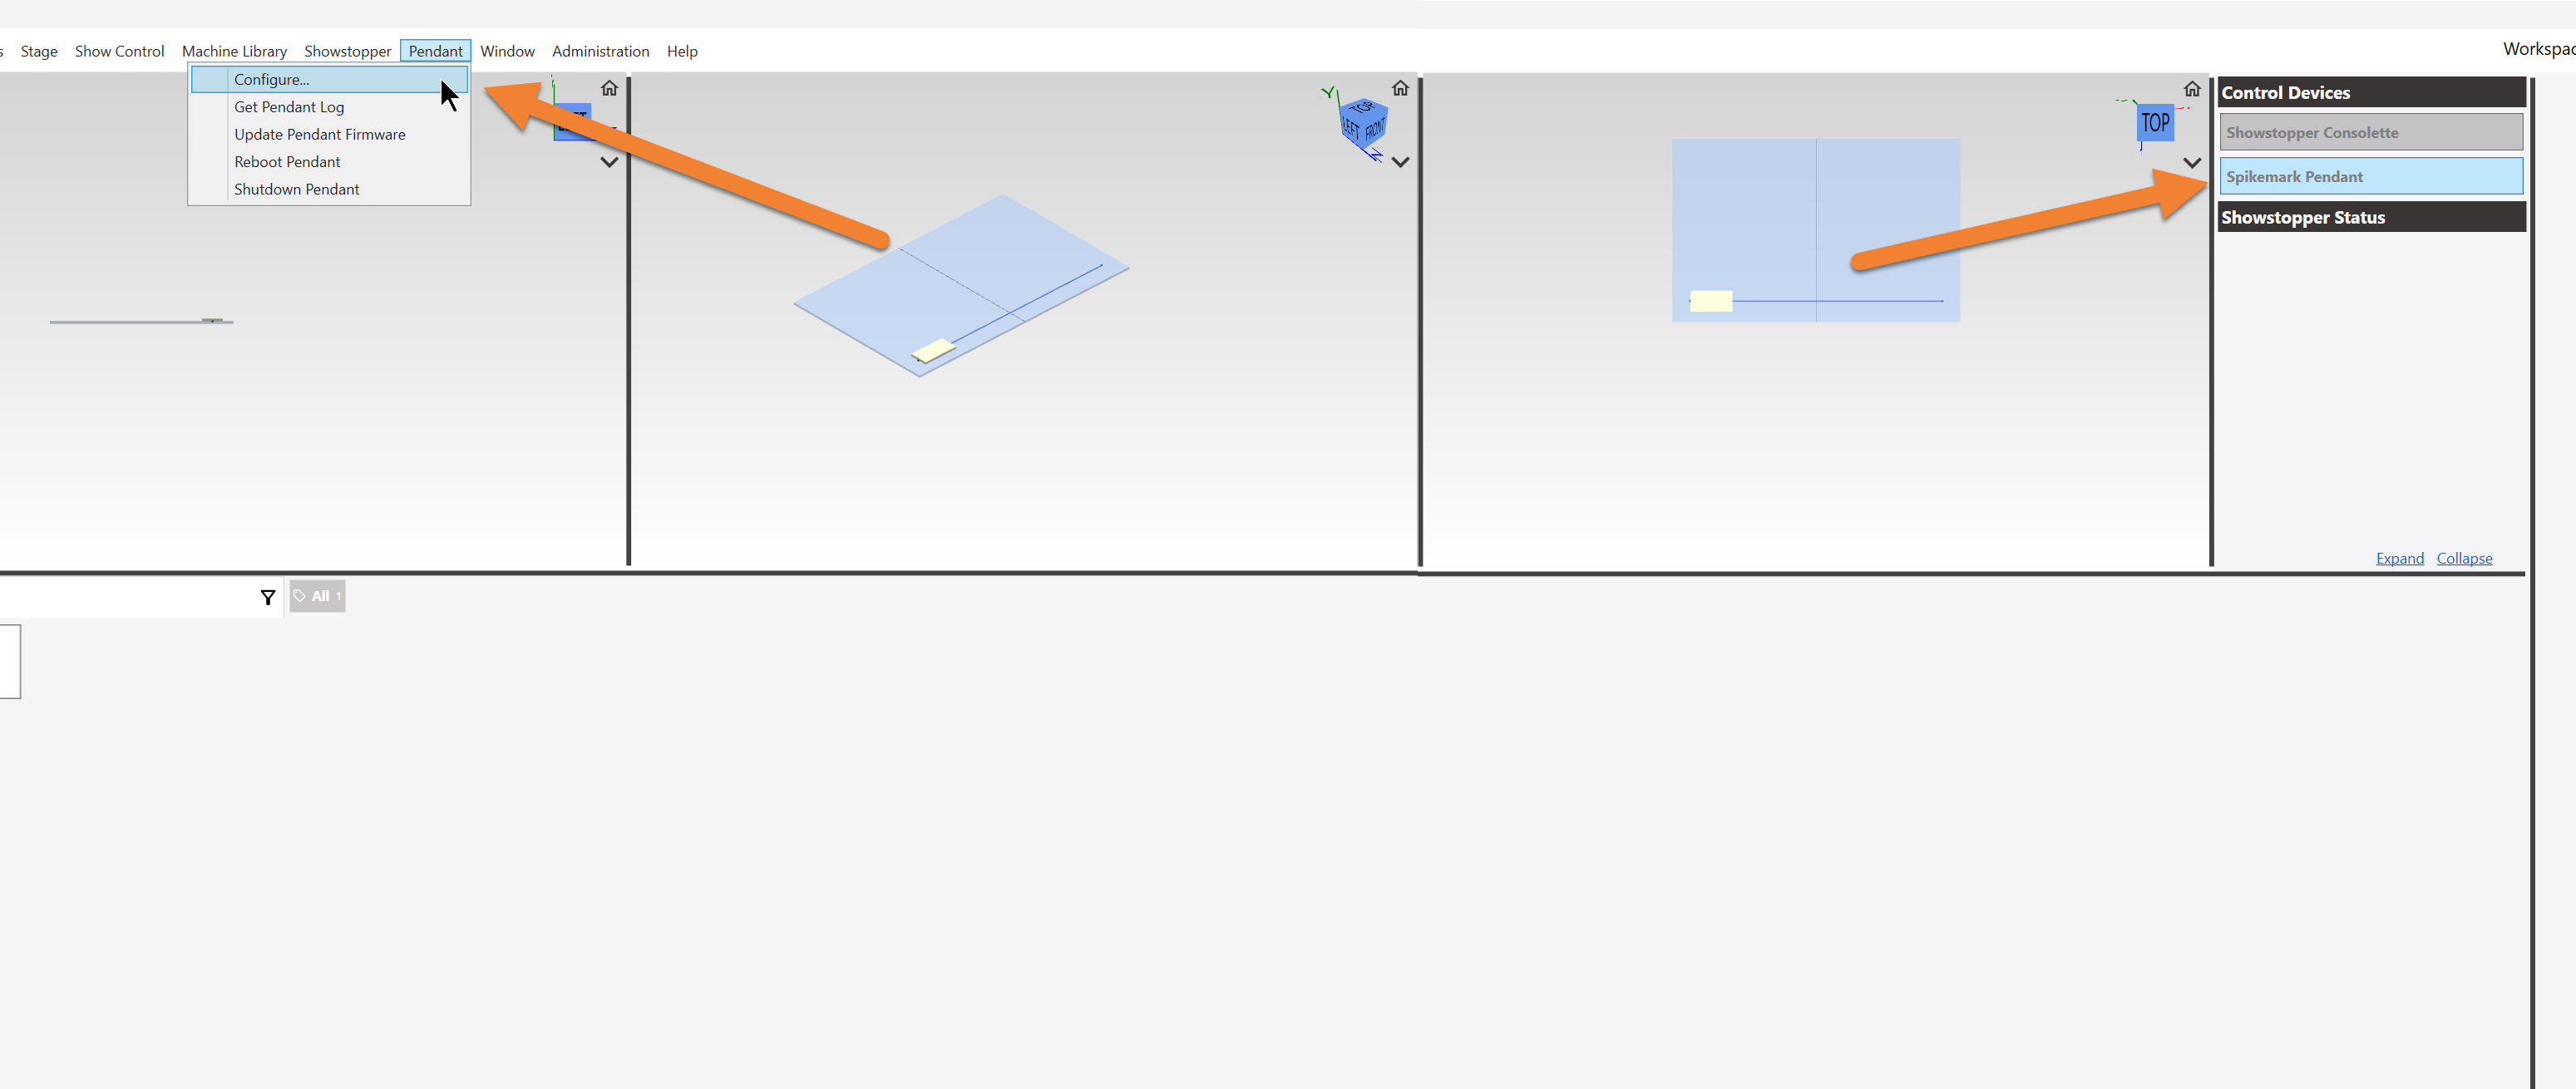
Open the Pendant configuration window Pendant menu or the Control Devices buttons:
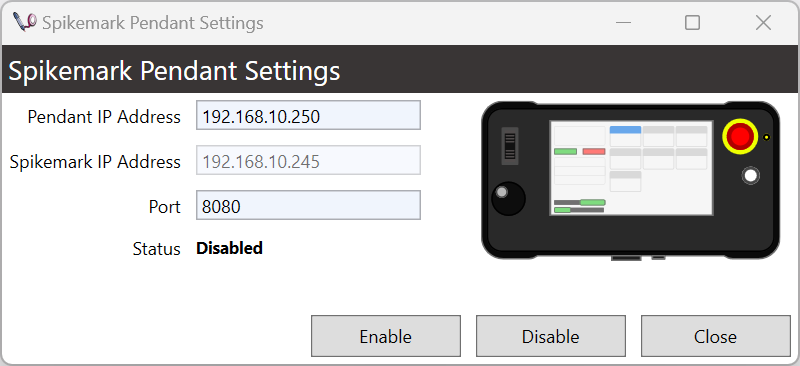
Confirm the IP Addresses are set correctly on both the Pendant and in Spikemark. If the Spikemark IP Address is not what you expected, check your netowkr settings and confirm the Spikemark IP Address under **File** -> **Spikemark Options**.
Check out this guide if you need to set your computer IP Address:
{% content-ref url="../../spikemark/ip-address-and-network-connection/setting-computer-ip-address" %}
[setting-computer-ip-address](https://docs.creativeconners.com/docs/spikemark/ip-address-and-network-connection/setting-computer-ip-address)
{% endcontent-ref %}
## Connect to the Pendant
{% content-ref url="../../spikemark/ip-address-and-network-connection/connecting-to-a-pendant" %}
[connecting-to-a-pendant](https://docs.creativeconners.com/docs/spikemark/ip-address-and-network-connection/connecting-to-a-pendant)
{% endcontent-ref %}
With matching IP address on the Pendant and in Spikemark, and the Pendant **Enabled** in in Spikemark, just click the connect button on the Pendant screen.
Once the Pendant is connected the display will change from the configuration screen to the operation interface.