> For the complete documentation index, see [llms.txt](https://docs.creativeconners.com/docs/llms.txt). Markdown versions of documentation pages are available by appending `.md` to page URLs; this page is available as [Markdown](https://docs.creativeconners.com/docs/showstopper/spikemark-vantis/5-preset-workspace.md).
# Preset Workspace
Presets provide a simple way to execute cueable movement. With a single selection, multiple axes can move to different positions, at different speeds, and at different times. All of this is triggered through one Preset selection and executed by holding the **Enable button**.
Presets provide a reliable way to consistently set the stage for different looks, whether for a show, concert, or speaker series.
Presets can even trigger network messages like OSC commands, enabling Spikemark to send cues to other connected devices.
***
## Authoring Presets
You can create presets using the [Quick Save](/docs/showstopper/spikemark-vantis/5-preset-workspace/saving-presets.md#quick-save) functionality on the Pendant, or by [writing cues](/docs/spikemark-6/cues.md) and [creating presets from them](/docs/spikemark-6/presets/create-edit-delete-presets.md) in the full Spikemark software.
To edit details like the name or notes, or to delete a preset, you can **double tap** a preset card to access its [Preset Details](/docs/showstopper/spikemark-vantis/5-preset-workspace/preset-details.md) page.
***
## Preset Workspace
To access the **Preset Workspace**, simply toggle the menu on the bottom right hand of the screen.
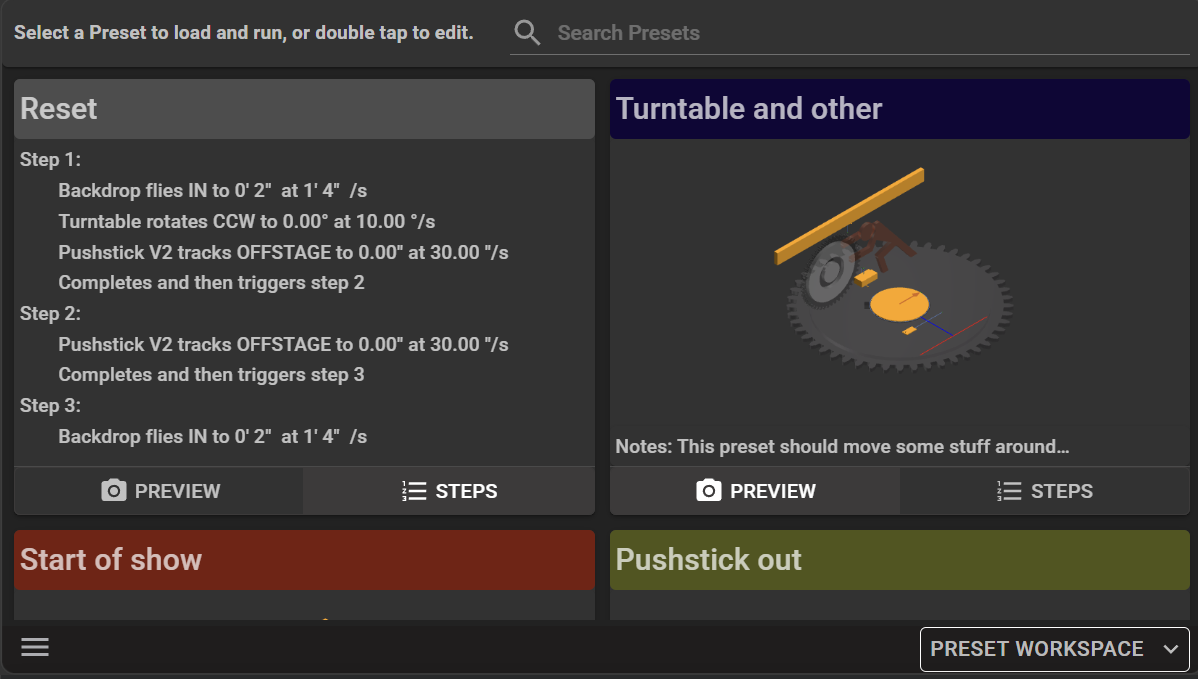
Once you enter the **Preset Workspace**, you’ll see a list of available Presets that were previously created in Spikemark. To browse the list, simply press and drag your finger up or down on the touchscreen to scroll.
Each Preset displays its name along with any Preset notes below it. A 3D model preview shows the completed look, helping you quickly confirm you’ve selected the right Preset.
Want more detail? Toggle to the 'Steps' view. A step-by-step breakdown shows which axes move, where they move to, and how fast they get there. Each step performs a series of programmed movements and may trigger multiple actions across subsequent steps.
Presets can be simple or highly choreographed—it’s entirely up to how your space operates.
## Preset Movement
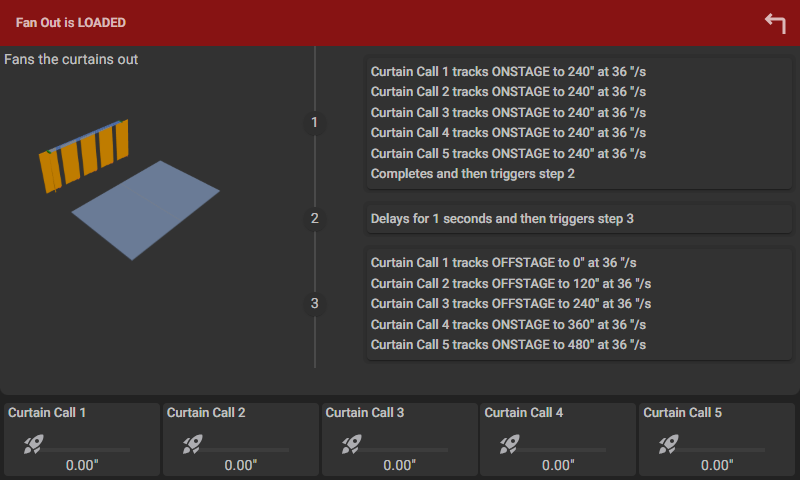
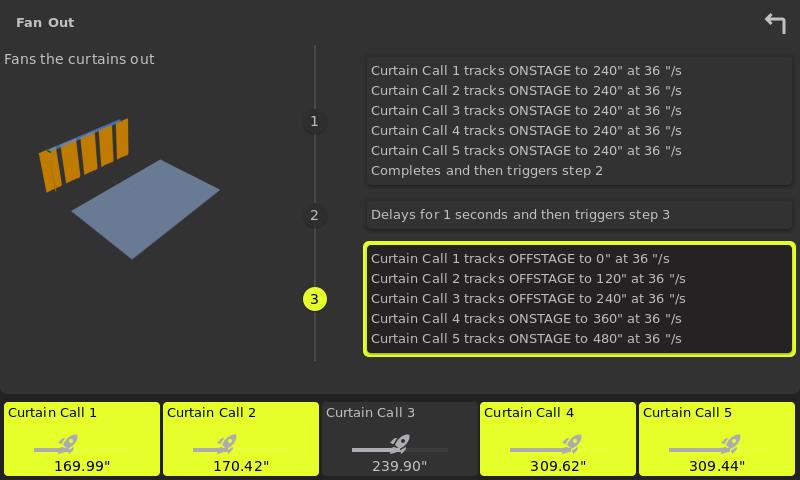
To run a Preset, select the desired Preset from the list. The **Motion Header** will turn **Red**, indicating the Preset is loaded and ready to run. You’ll also notice a **Stagehand Card** appear at the bottom of the screen for each axis included in the Preset.
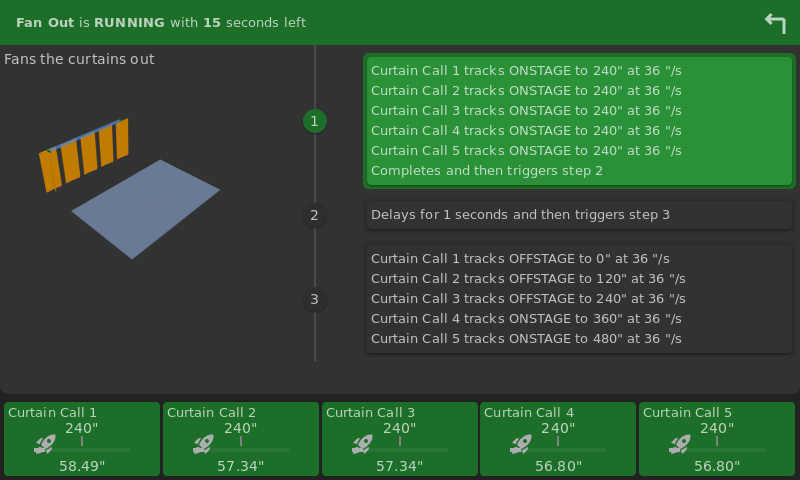
Press and hold the **Enable Button** to start the Preset. Each axis will move according to its programmed timing, speed, and target position. Once movement begins you'll notice the active **Stagehand Cards**, the current step, and the **Motion Header** turn **Green**. The rocket indicator will track from left to right on each active card, and position feedback will update as each axis approaches its target. A countdown in the **Motion Header** will also show how much time remains until the movement is complete.
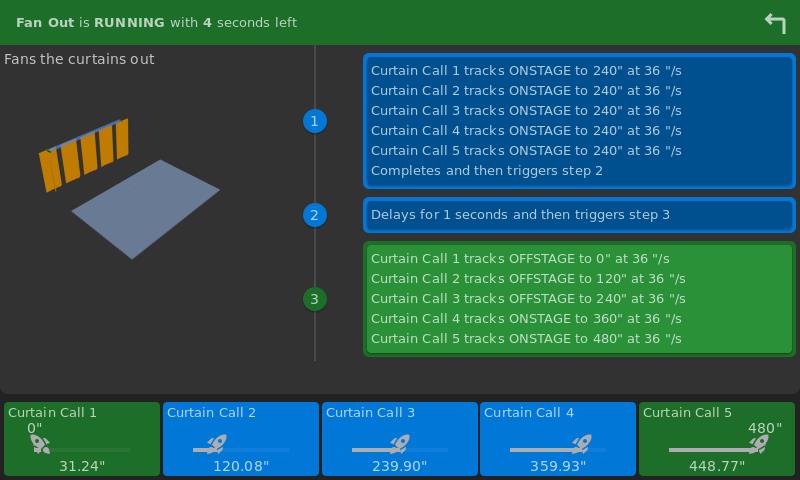
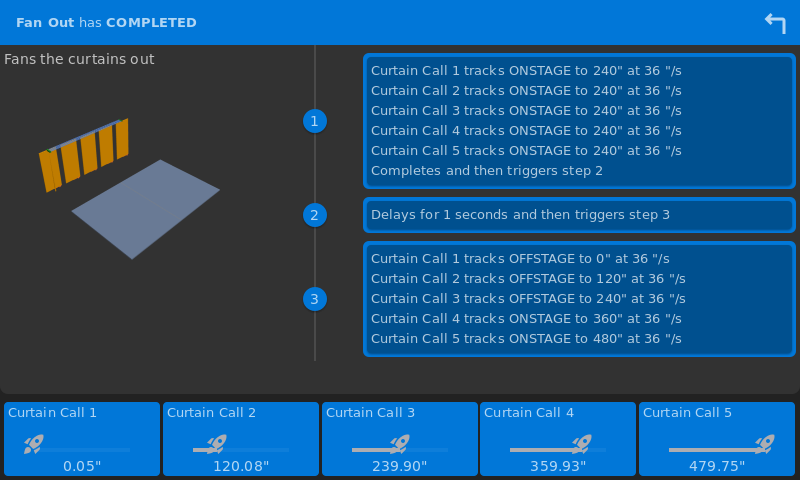
As each axis reaches its destination and each step completes, its indicator will turn **Blue** confirming the movement has finished.
Once all steps have been completed, the **Motion Header** will display "complete" and it, all **Stagehand Cards** and the step list will all highlight in **Blue**. From there, you are free to release the **Enable Button** and hit the **Back Button** in the top right corner to get back to the **Preset List**.
If the **Enable Button** is released during execution, any moving axes will perform a controlled soft stop and appear **Yellow** while slowing down. Once motion stops, the color indicators will clear and the Preset will need to be reloaded before continuing.
To reload the Preset, tap the **Back Button** in the top-right corner of the screen to return to the **Preset List**. Select the Preset again, then press and hold the **Enable Button** to resume motion.
---
# Agent Instructions
This documentation is published with GitBook. GitBook is the documentation platform designed so that both humans and AI agents can read, navigate, and reason over technical content effectively. Learn more at gitbook.com.
## Querying This Documentation
If you need additional information that is not directly available in this page, you can query the documentation by asking a question.
Perform an HTTP GET request on the following URL with the `ask` and `goal` query parameters:
```
GET https://docs.creativeconners.com/docs/showstopper/spikemark-vantis/5-preset-workspace.md?ask=&goal=
```
`ask` is the immediate question: it should be specific, self-contained, and written in natural language.
`goal` is what the user is ultimately trying to achieve, the reason they need the answer. Sharing it helps GitBook give you a better, more relevant answer. A goal is most helpful when it describes the outcome the user wants rather than restating the question. For example, with `ask=how do I create an API token`, a goal like `automate deployments from our CI pipeline` lets GitBook tailor the answer to that use case.
The response will contain a direct answer to the question and relevant excerpts and sources from the documentation.
Use this mechanism when the answer is not explicitly present in the current page, you need clarification or additional context, or you want to retrieve related documentation sections.